Creating a recovery drive for Windows 11 is a crucial step in ensuring the safety and integrity of your system. A recovery drive allows you to troubleshoot and restore your operating system in case of failures or severe issues. This article will guide you through the process of creating a recovery drive for Windows 11, highlighting the steps you need to take, and addressing common concerns along the way.
Windows 11 Overview
Windows 11 is the latest operating system from Microsoft, featuring a revamped user interface, enhanced performance, and improved security features. The system is designed to provide a more seamless experience across devices, making it essential for users to familiarize themselves with its functionalities. Understanding Windows 11 is the first step in effectively managing your system and ensuring that you are prepared for any potential problems that may arise.
Importance of Recovery Drive
A recovery drive is a vital tool that allows users to restore their system to a working state in the event of a crash or other critical failures. It provides a means to access troubleshooting tools and reinstall Windows if necessary. Without a recovery drive, users may find themselves unable to resolve issues independently, potentially leading to data loss or extended downtime.
Requirements for Creating Recovery Drive
Before starting the process of creating a recovery drive, you need to ensure that you have the proper requirements. A USB flash drive with at least 16GB of free space is typically needed, and it is essential to back up any data on the drive, as creating a recovery drive will erase all existing data. Additionally, ensure your system is updated to the latest version of Windows 11 to avoid compatibility issues during the process.
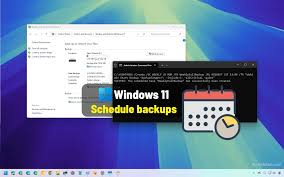
Steps to Create Recovery Drive
To create a recovery drive in Windows 11, follow these steps:
1. Insert a USB flash drive into your computer.
2. Open the Start Menu and type “Create a recovery drive” in the search bar.
3. Select the “Create a recovery drive” option from the results.
4. When prompted, make sure to check the box that says “Back up system files to the recovery drive” to enable more comprehensive recovery options.
5. Click “Next,” select your USB drive, and then click “Next” again to start the process.
6. Confirm the warning that all data on the USB drive will be deleted, and click “Create” to begin the creation of the recovery drive.
7. Wait for the process to complete, which may take some time depending on the size of the files being copied.
Troubleshooting Recovery Drive Issues
Sometimes users may encounter issues while creating a recovery drive. Common problems include the USB drive not being recognized, insufficient space, or errors during the creation process. If you face any issues, try using a different USB port or drive, ensure that the drive is formatted correctly, and check for any system updates that may resolve underlying issues.
Using Recovery Drive for Troubleshooting
Once you have created a recovery drive, you can use it to troubleshoot various problems. If your computer fails to start properly, you can boot from the recovery drive by changing the boot order in the BIOS or UEFI settings. The recovery options available include startup repair, system restore, and command prompt, which can help diagnose and fix issues effectively.
Updating Recovery Drive
It is essential to keep your recovery drive updated, especially after significant system updates or changes. To update your recovery drive, you can repeat the creation process using the same USB drive. This will ensure that the latest system files and recovery options are included, providing you with the most effective tools for troubleshooting and recovery.
| Step | Action | Expected Outcome | Troubleshooting Tip | Notes |
|---|---|---|---|---|
| 1 | Insert USB drive | Drive recognized by system | Try a different USB port if not recognized | Ensure drive is empty |
| 2 | Open recovery tool | Tool launches successfully | Check Windows updates if it fails to launch | Search for “Create a recovery drive” |
| 3 | Choose backup option | System files included in backup | Uncheck the box if you want a minimal backup | More files mean a larger recovery drive |
| 4 | Finalize creation | Recovery drive created | If it fails, format the USB drive and retry | Be patient, as this can take time |
Creating a recovery drive in Windows 11 is a straightforward process that can save you from future headaches. By following the outlined steps, you can ensure that your system is prepared for any unexpected issues. Regularly updating your recovery drive will further enhance your preparedness, allowing you to troubleshoot and resolve problems effectively.
FAQs
What is a recovery drive?
A recovery drive is a USB drive that contains tools to help you troubleshoot and restore your Windows operating system in case of problems.
How much space do I need for a recovery drive?
You need at least 16GB of free space on the USB drive to create a recovery drive for Windows 11.
Can I use any USB drive for the recovery drive?
Yes, you can use any USB drive that meets the minimum space requirement, but ensure it is formatted and backed up, as the creation process will erase all data on it.
How often should I update my recovery drive?
It is recommended to update your recovery drive after significant system updates or changes to ensure it contains the latest system files and recovery options.