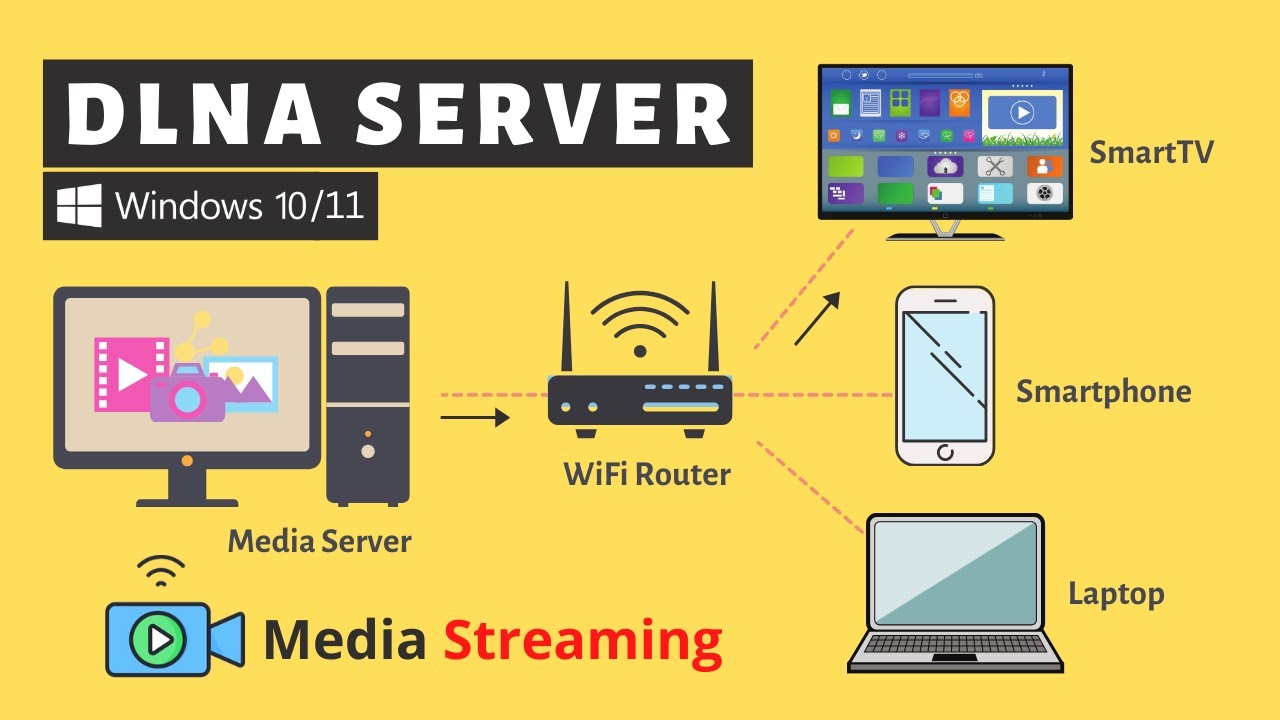
Enabling DLNA Media Server in Windows 11 can transform your home entertainment experience by allowing devices on your network to stream media seamlessly. Whether you want to watch movies, listen to music, or view photos from your PC on your smart TV or other DLNA-compatible devices, the process is straightforward. This guide will walk you through the essential steps to activate the DLNA Media Server feature in Windows 11. With just a few adjustments in your settings, you can unlock a world of multimedia possibilities. Let’s dive into the steps you need to follow to set up your DLNA Media Server.
Accessing Windows Media Player Settings
To enable DLNA Media Server, the first step is to open Windows Media Player. This application comes pre-installed on Windows 11 and serves as the primary interface for managing your media library. Once open, you will need to navigate to the ‘Stream’ menu, where you can find options related to media sharing.
Setting Up Media Streaming Options
In the ‘Stream’ menu, select ‘Turn on media streaming.’ This action will open a new window where you can configure media streaming settings. Here, you can choose which devices are allowed to access your media library and adjust other preferences to enhance your streaming experience.
Configuring Network Discovery
For DLNA to function properly, network discovery must be enabled. This allows your PC to be visible on the network, so other devices can find and connect to your media server. You can do this by going to the ‘Network and Internet’ settings in Windows 11, selecting ‘Network and Sharing Center,’ and ensuring that network discovery is turned on.
Adding Media to Your Library
After enabling media streaming and network discovery, the next step is to add media files to your Windows Media Player library. This can include music, videos, and photos stored on your PC. You can add folders or individual files, which will then be shared with all authorized devices on your network.
Testing DLNA Connection
The final step is to test the connection to ensure that your DLNA Media Server is working correctly. Use a DLNA-compatible device, such as a smart TV or a media player, to search for available media servers on your network. If everything is set up correctly, your Windows 11 PC should appear as a media server, allowing you to stream your content effortlessly.
| Step | Description | Action Required | Expected Outcome | Notes |
|---|---|---|---|---|
| Accessing Windows Media Player | Open the application | Launch Windows Media Player | Media Player interface displayed | Ensure it’s installed on your PC |
| Setting Up Streaming | Enable media streaming | Select ‘Turn on media streaming’ | Streaming options available | Review device access settings |
| Configuring Discovery | Enable network discovery | Access network settings | PC visible on network | Check firewall settings if issues arise |
| Testing Connection | Connect via a DLNA device | Use a compatible smart TV | Media server detected | Ensure all devices are on the same network |
Enabling DLNA Media Server in Windows 11 is a simple process that enhances your media streaming capabilities. By following the steps outlined above, you can easily set up your PC as a media server, allowing seamless access to your favorite content on various devices throughout your home. This functionality not only simplifies the way you consume media but also provides a centralized hub for your entertainment needs.
FAQs
What is DLNA?
DLNA stands for Digital Living Network Alliance. It is a set of guidelines that allows devices to share digital media over a home network.
Can I use DLNA with any device?
Not all devices support DLNA. You will need a DLNA-compatible device, such as a smart TV, gaming console, or media player, to access media streamed from a DLNA server.
Is Windows Media Player the only way to enable DLNA on Windows 11?
While Windows Media Player is the primary method, there are third-party applications available that can also enable DLNA functionality on Windows 11.
Do I need a wired connection for DLNA streaming?
No, a wired connection is not necessary. DLNA can work over Wi-Fi, as long as all devices are connected to the same network. However, a wired connection may provide a more stable streaming experience.