Creating a system image backup is an essential task for anyone using Windows 10 or Windows 11. A system image backup allows you to create a complete copy of your operating system, applications, settings, and files. This can be invaluable in case of system failure, data corruption, or hardware issues. By having a system image, you can quickly restore your system to its previous state without losing your valuable data. In this article, we will guide you through the necessary steps to create a system image backup, ensuring that your system is safe and secure.
Accessing Backup and Restore
To begin the process of creating a system image backup, you need to access the Backup and Restore feature. In Windows 10 and 11, this feature can be found in the Control Panel. Navigate to the Control Panel, click on “System and Security,” and then select “Backup and Restore (Windows 7).” This may seem outdated, but it’s the tool you’ll need for creating a system image backup.
Selecting the Backup Location
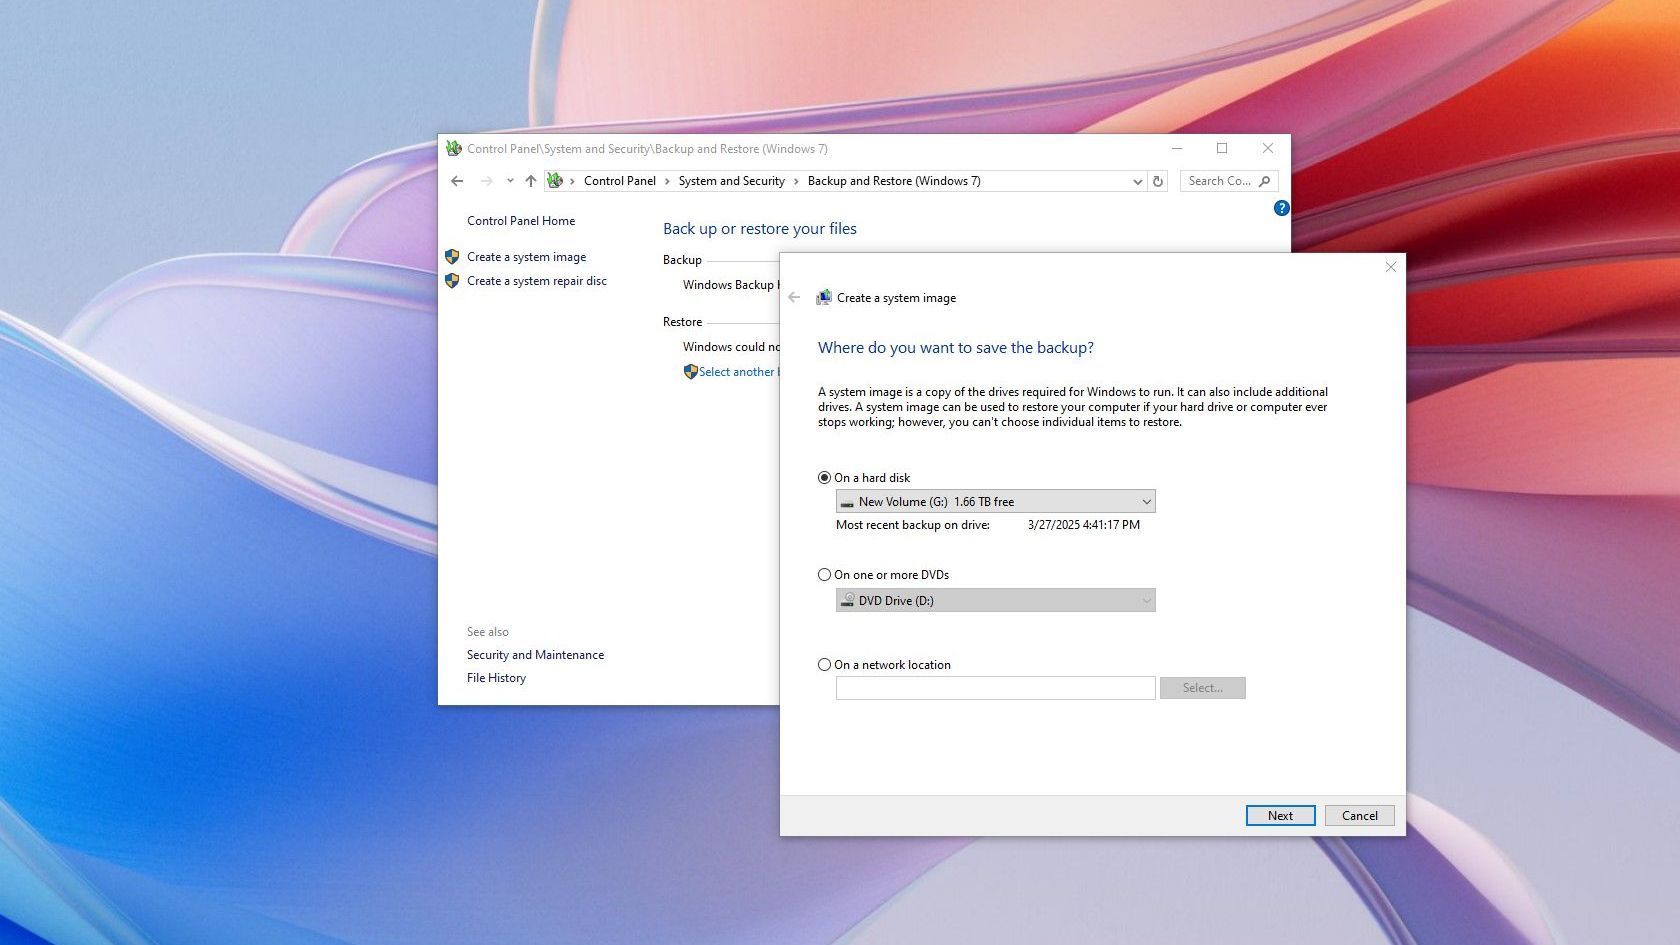
Once you’ve accessed the Backup and Restore interface, the next step is to select where you want to save the system image. You can choose to save it on an external hard drive, a network location, or DVDs. It’s advisable to use an external hard drive for ease of access and storage capacity. Ensure that the selected location has enough space to accommodate the entire system image.
Choosing What to Backup
In this step, you will be prompted to choose what to include in your system image backup. By default, Windows will include the system drive (usually C:), which contains the operating system and installed applications. If you have additional drives or partitions that you want to back up, you can select them as well. Make sure to review your selections carefully.
Creating the System Image
After selecting the backup location and the drives to include, you can proceed to create the system image. Click on the “Create a system image” option and follow the prompts. Windows will begin the backup process, which may take some time depending on the size of the data being backed up. It’s important to keep your computer powered on and connected to the backup device during this process.
Completing the Backup Process
Once the system image has been created, you will receive a confirmation message. At this point, you may also be given the option to create a system repair disc. This disc can be used to boot your computer in case of a failure and is highly recommended. If you choose to create the disc, follow the on-screen instructions.
Verifying the Backup
After completing the backup process, it’s crucial to verify that the system image has been created successfully. You can do this by navigating to the location where you saved the backup and checking for the presence of the system image file. Additionally, you can use the Backup and Restore tool to confirm that the backup is recognized by the system.
Restoring from a System Image Backup
In the unfortunate event that you need to restore your system from the backup, you can do so easily. Restart your computer and boot from the system repair disc or recovery drive. Follow the prompts to select “Restore your computer using a system image you created earlier.” This will guide you through the restoration process, allowing you to recover your system to its previous state.
| Step | Description | Time Required | Tools Needed | Backup Type |
|---|---|---|---|---|
| Access Backup | Navigate to Backup and Restore in Control Panel | 5 mins | Windows PC | System Image |
| Select Location | Choose external drive or network for backup | 5 mins | External Drive | System Image |
| Create Backup | Start the backup process | Varies | Windows PC | System Image |
| Restore Backup | Use repair disc to restore system | 30 mins | Repair Disc | System Image |
Creating a system image backup is a critical step in safeguarding your data and ensuring that you can recover from unexpected issues. By following the steps outlined in this guide, you can easily create a backup that will protect your system and give you peace of mind. Regularly updating your system image will ensure that you always have a recent backup available, minimizing potential data loss.
FAQs
What is a system image backup?
A system image backup is a complete snapshot of your operating system, applications, settings, and files at a specific point in time. It allows you to restore your system to that exact state in case of failure.
How often should I create a system image backup?
It is recommended to create a system image backup at least once a month or whenever you make significant changes to your system, such as installing new software or updates.
Can I back up my files without creating a system image?
Yes, you can back up your files using Windows File History or other backup solutions, but a system image backup captures everything, including the operating system.
What should I do if the backup fails?
If the backup fails, check the error message for details and ensure that the backup location has enough space and is properly connected. You may also want to run Windows Update and ensure your system is up to date before trying again.